An LDAP integration allows your instance to use your existing LDAP server as the master source of user data.
This article is a supplement to the ServiceNow documentation. For full documentation please see the ServiceNow Documentation
Please note that it is important to try this integration in a development instance first and test the integration before going live in production.

Step 1: Define LDAP SERVER
You’ll need to expose the LDAP Server to ServiceNow. Here are few different ways to do this:
Option 1 – LDAP Server with Mid Server
This is the most common method as it is the easiest to configure and doesn’t require much effort from a company AD admin.
You’ll need to setup a midserver to use this method. Please note that you can’t authenticate (login) using this method and you can’t use a SSL connection.
For authentication, an SSO connection is often configured. So you use the LDAP Integration to pull in users/groups and SSO to authenticate (login).
Option 2 – LDAP Server with VPN
For this method, you need to ask ServiceNow for a VPN Request though HI Support. This method isn’t that preferred is that you are relying on the ServiceNow VPN to work and other maintenance concerns.
Details from HI Support:
ServiceNow provides secure communications with customer networks over the public Internet using IPSEC VPN technology. A clustered pair of Cisco ASA devices are used as the termination point for encrypted IPSec tunnels. Please note, a site-to-site VPN connection between ServiceNow and your network is only used for traffic that is initiated by ServiceNow. Traffic destined for ServiceNow will always be HTTPS, and will always use the internet as a transport. As your ServiceNow instance is deployed into two ServiceNow datacenters for our Advanced High Availability, we will be building two VPN tunnels to your network.
Option 3 – External IP Address
For this method, you expose an external IP Address to ServiceNow.
Be sure a network administrator configures the local firewall to allow the application server to access the LDAP server. If the LDAP server is located within an internal network, the firewall forwards (or NATs) the application server’s IP address through the firewall on the correct port.
Option 4 – LDAPS with PKI certificate
Most companies don’t have LDAPS (note the “S”). However for the companies that do, this is the superior method to connect in my opinion.
Step 2: CREATE LDAP Server
Create LDAP Server Record
- Left Navigator Bar > Create New Server
- Fill in form fields. Field descriptions from the ServiceNow Documentation
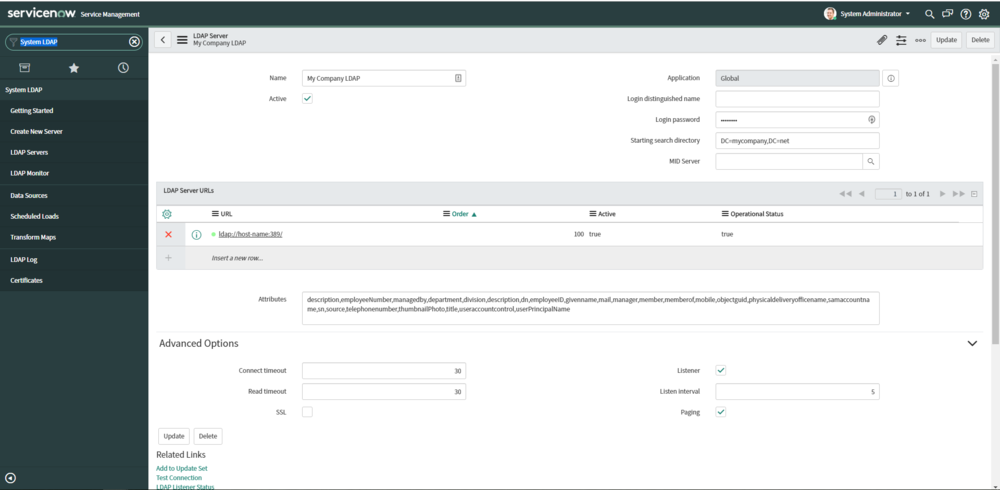
Example LDAP Server
Make sure to specify which LDAP Attributes to import. Without specifying the LDAP attributes, the import set creates many fields, which can exceed the row size limit during the import process.
Common Attributes
description,employeeNumber,managedby,department,division,description,dn,employeeID,givenname,mail,manager,member,memberof,mobile,objectguid,physicaldeliveryofficename,samaccountname,sn,source,telephonenumber,thumbnailPhoto,title,useraccountcontrol,userPrincipalName
3. Click Submit
4. When set to Active, the connection is tested. Red is bad. Green is good!
Additional Notes
STEP 3: LDAP Browse
In the following step, you need to specify the RDN and Filters for the User and Group accounts. The RDN and Filters, tell ServiceNow where to look for the data.
How do you know where the data is stored in LDAP? Every LDAP directory structure is different, so you need to Browse.
In the LDAP Server you setup in the last step, use the Related link Browse to browse the LDAP Server and find the data you want to pull.
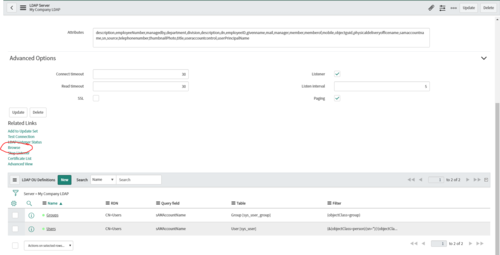
Step 4: LDAP OU Definitions
After you determine the data you want to pull you update the LDAP OU Definitions (Located in the LDAP Server record at the bottom of the form).
Click the Browse button on the LDAP OU Definition after you set it up to verify it is going to the right location.
Sometimes you need to setup new extra LDAP OU Definitions if the data is in different directories and not just parent/child directories.
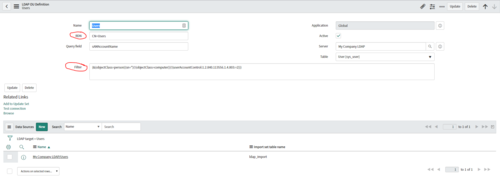
LDAP OU Definition (User)
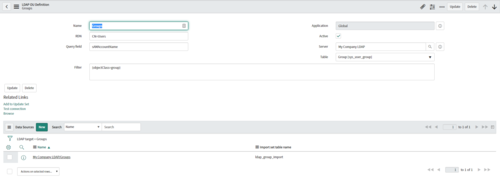
LDAP OU Definition (Groups)
Step 4: Data Source
Under each LDAP OU Definition, there is a data source. In the data source you can run the import and see where what import set the data is being loaded into.
Click “Load All Records” to load the data into import sets.
Step 5: Import Sets
Import sets are temporary “staging tables” in ServiceNow that data sits before it is “transformed” into actual ServiceNow data.
Out-of-the-box, the user import set is ldap_import, and the group import is ldap_group_import.
LOOK for Truncated import set data
Go review the import set data and make sure the columns created for the data are big enough. You may need to increase the size of a column in the import set if the data is being truncated.
Step 6: Transform Maps
Configure Transform Map

Transform Map
When you get to the Transform Maps, make sure you are testing this work in development first!
The transform maps convert the data from the import set into actual user an group records.
The LDAP User Import transform map is the one you typically modify. Some common configurations of the user transform map.
- Coalesce Match. Important to choose a coalesce in the field map so that you don’t get duplicate user records. Companies often use samaccountname or objectguid for the coalesce field.
- Additional fields. If you have additional fields to map, here’s the place.
- Import User Photo from LDAP. Here is an article on how to Import User Photo from LDAP.
Run Transform
When you are ready to transform, click the Transform Related Link in the Transform Map.
View the Log after data load to see if any errors occur.
Step 7: Scheduled Loads
After your data is imported correctly. Schedule that data loads. This is done under System LDAP > Scheduled Loads. You activate the data import and set a run schedule. Most companies run it daily in the evening.
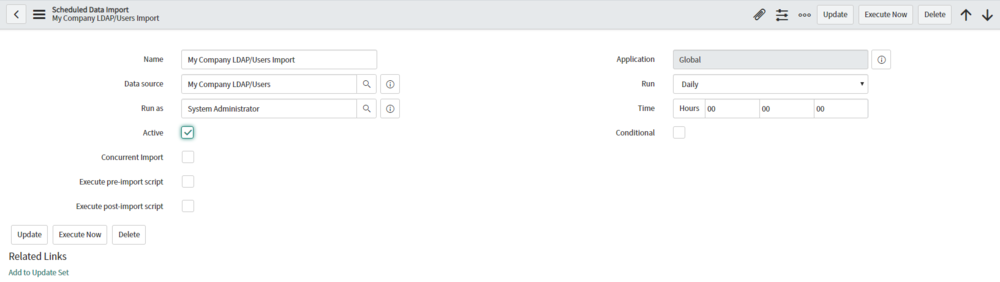
Scheduled Data Import